
For every newly installed or updated module, we now have to run setup:upgrade, compile code and take a few other final steps. This process often makes the store either slow or unavailable for a while.
All of these new steps, operations and features come at a price for the client.
IM Digital has been working with Magento since Magento 2.0 – and we’ve tried different approaches over the years to develop a process that allow us to deploy at any time, any day, without any problem.
Then there’s “continuous delivery and continuous integration”. Every week there are new features, sometimes fixes, but always improvements; the nature of Agile development means we’re constantly delivering code changes and feature enhancements to Magento 2 stores. Following a standard GitFlow process allows us the opportunity to test internally, with the client, and then deploy to production environments with confidence and certainty.
Imagine the difficulties in leveraging all of this development responsibly and having to explain to the client why they’re constantly down. We had to find a solution for this challenging situation in order tomake it possible to automatically deploy every new change in a test environment when the developer pushes it to the repository – and to automatically deploy the changes to the production environment when our Git gatekeeper reviewed and approved it.
By creating a continuous delivery process, every new change can be tested and delivered without friction and the final customer will not suffer from slow site speed or outages while progress is being made.
Last year we started to study the Deployer Tool, a deployment tool written in PHP with support for popular frameworks out of the box – but no support for Magento 2 (yet).
We saw many people in the PHP community using Deployer to automate their deployments and achieve good results when using it for Magento 2, so we decided to build our own Deployer tool for Magento 2. Our new Deployer tool is used internally for our projects, with the main goal of achieving a zero-downtime deploy while supporting continuous integration and delivery.
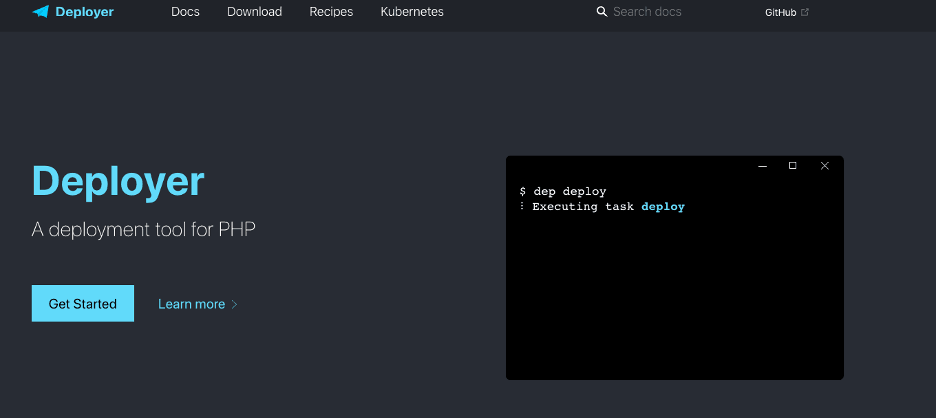
(Figure 1: The deployer tool)
Deployer pulls the code from a Git repository and creates a release folder in the server, with all the files pulled from the repository. This new release folder should be the path used by the webserver to make the website available. Using Deployer, we always have a release folder as the current release that is being executed by the webserver, and when we deploy new changes, the Deployer will create a new release, pull all the files and run all the tests that we need. If everything passes, we will change (as the last step) the new release folder that we just deployed to be our new path used by the webserver online. This is the main reason the zero-downtime magic happens.
As mentioned before, things are a little more difficult in the Magento 2 world, so this approach used by Deployer will not guarantee zero downtime with Magento 2. Currently, our Deployer tool for Magento 2 is allowing us to deploy websites with module upgrades, code changes and layout changes with zero downtime. Following are some simple tips for achieving this goal.
First, your store needs to be hosted on a stable, reliable, scalable and powerful Magento hosting environment. We started to test our Deployer tool in websites hosted by one of our partners, MageMojo.
Deployer, by default, creates a “current” symlink; that is a shortcut pointed to the last deployed release. Every time we deploy new changes, Deployer will create a new release folder and this symlink will be deleted and created again, pointing to the newly deployed release folder.
Using Deployer to deploy our code, it will pull the code from the repository and put it in a new release folder. With Magento, we know there are more steps, so we’ll need to run Composer install to install the Composer packages, then we run setup:upgrade to run the install/upgrade scripts, setup:static-content:deploy to deploy the themes and setup:di:compile to compile all the code. Each of these steps had to be considered and added to our Deployer tool.
These are some of the things we had to consider to avoid downtime and increase performance. The most important step is the setup:upgrade command. This command deletes all the generated classes, clears all caches, updates the setup_module table, the app/etc/config.php and checks all the extensions to see if there’s an update or a new module being installed. If the answer is yes, it runs the setup/update script. Because this command takes more time to complete and allows for the most risk in zero-downtime, we only run it when necessary.
Where did we get this information?
Most Magento 2 deployment tools are running the “magento setup:db:status” command to check if the database is up to date with all the installed modules. But recent Magento releases were experiencing errors with this command, so it became useless in our process. Magento 2.3 now has a declarative schema, which means a module using the declarative schema script is no longer storing the module version in the setup module database table. We can’t use this approach on Magento 2.3. As a fix, we added a method in our Deployer tool that checks all the installed modules on app/code and vendor in the previous release – and compares it with the current version.
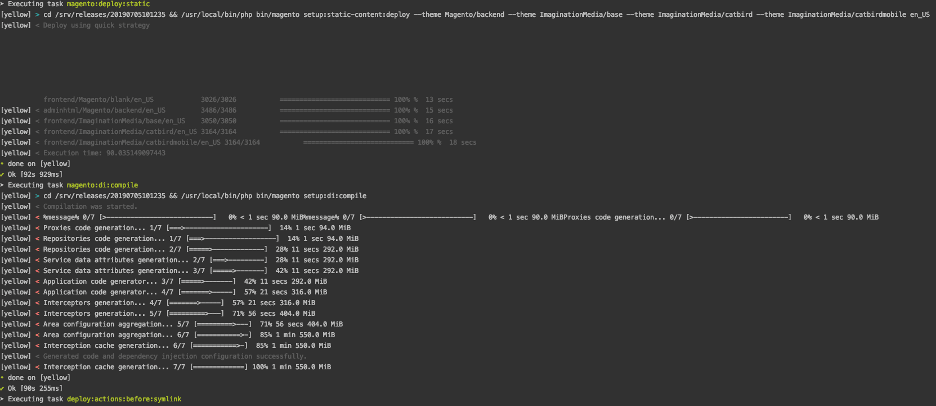
(Figure 2: Our deployer toll deploying a website and taking care of all the Magento commands)
Next, we deploy the themes, deploying only the base themes in use and ignoring all others (e.g. Luma). Then we compile and run internal testing to validate the changes and feature requests. Once the client has also User-Acceptance tested the product, we’re ready to move the current release into production – which happens instantaneously.
Let’s put all the pieces together now.
We use BitBucket Cloud to manage all of our repos, and BitBucket Cloud has the “Pipelines” feature. Pipelines allow us to run a Docker image in a bitbucket server, and this server will run one or multiple defined tasks. These tasks will be triggered when a change happens in specific, defined branches. In our case, every time we push code to the staging branch (the branch used to build the test environment), we need to trigger a new deployment so developers can view the changes in the test environment. Inside our pipelines config, we defined an action to use our Deployer tool and start a new deployment every time this branch receives a new commit.
By automating this process, developers are no longer dependent on a gatekeeper during their development lifecycle, and code does not have to be manually pushed.
For a production environment, things are a little bit different. Only the Git gatekeeper can push the code to the master branch, but when he or she does that, the same action occurs. We start to deploy production using Bitbucket pipelines and our Deployer tool.
Using Bitbucket pipelines, we can also set up tests to be executed after deployment – like a product creation or an API call to a third-party service. These tests will be automatically executed after every new deployment and we will be notified if they fail.

(Figure 3: Bitbucket pipelines deploying a website using our deployer tool)
Bitbucket pipelines also allow us to schedule deployments. For example, we can define that we’re going to deploy a website every Tuesday and Thursday at 8 a.m. We can schedule these deployments and pipelines will use our Deployer Tool to make all the magic happen.
Our result? We’re able to deploy Magento 2 stores in less than 5 minutes, withZERO downtime. We also have a real CI/CD process with all of this integrated. Developers are enjoying a great experience with the process, which is making things a lot faster.
Additionally, if you read the Deployer documentation, you’ll see you need to create a deploy.php file in your project and start to set up the environments and all the project info. Our Deployer Tool is a composer package and once it’s installed in your Magento store, you’ll only need to set these settings on bitbucket. No deploy.php and no code changes are necessary.
The Deployer Tool that we created is not available in a public repo, but if you’re interested in knowing more or want to implement it in your project, contact us. We’ll gladly help you explore this exciting new possibility!